There is a throw-back challenge this week on the Simon Says Stamp Monday Challenge Blog. I've chosen to go with the January 2014 Blues Challenge.
For this adorable mini card, I used the Jar Stamp and Die set by Stephanie Barnard from Sizzix. I cut the jar twice on Michael's 120lb cardstock. I then used Distress inks to color the front of the card, with Peacock Feathers on the bottom, Blueprint Sketch in the middle, and Chipped Sapphire at the top. I sprinkled some water droplets on the card for some texture, and then I used some Sakura Koi white watercolor and flicked little speck on to create the snow.
I die cut the hills from Simon Says Stamp's Stitched Slopes and Hills, and then die cut the hills using the jar die again so that they fit perfectly onto my card. I also used Simon Says Stamp Village Dies to cut out the houses and trees. I attached the houses and trees to the hills and then adhered the hills to the card front using foam tape to give them some dimension. Finally, I used Close to My Heart's Bright Spirits stamp set to add the sentiment in Pacifica ink.
Yesterday, I got my Stamp of Approval Holiday Box from Catherine Pooler! I was so excited when she announced this box and I knew that I had to have it! It comes with 5 (yes, you read that right 5!!) great stamps sets, and 3 sets of beautiful coordinating dies! I was so excited that I had to make 2 cards right away.
I love the versatility of these stamp sets; they come with an assortment of stamps including sentiments, snowflakes, a Christmas tree and baubles, and borders! To see the stamps included in the set, check out my video below:
I made two cards from the box, one in traditional Christmas and one in non-traditional colors. For the one in traditional Christmas, I used the Holiday Flourishes set from The Ton. Using Close to My Heart's (CtMH) Sweet Leaf and Topiary inks for the holly leaves, and Cranberry ink for the berries, I stamped a wreath shape on the top part of the card. I also used the candy cane border stamp from the Winnie and Walter Holiday Trimmings set, which I stamped onto the card base in Cranberry. I die cut the Happy Holidays from Neat and Tangled from gold foil and adhered it under the wreath using a glue pen. I popped up the front panel using fun foam, and that was it! Pretty simple, huh?
For the non=traditional card, I used the tree border from the Holiday Trimmings set, which I stamped repeatedly onto a 4 1/4 by 5 1/2 white cardstock panel using CtMH's Pixie, Glacier, and Sweet Leaf inks. I then cut another white panel which was 2 1/2 by 5 1/2, and stamped the awesome tree from the Bright Baubles set. The sentiment is from the same set, embossed using Simon Says Stamps gold. I used the Little Bits dies to die cut the baubles and then stamped them using the same ink colors. The little bauble stamps in this set are gorgeous! I then stuck the baubles onto the tree. I mounted the white panel onto a 2 3/4 by 5 1/2 aqua cardstock panel, which I stuck on to the card, offset to the right. I love the way this one came out!
So there you have it. I absolutely adore Catherine's Stamp of Approval box, and definitely intend to get the next one that comes out, which I beleive is in January. If you want the next box, don't forget to sign up to the wait list!
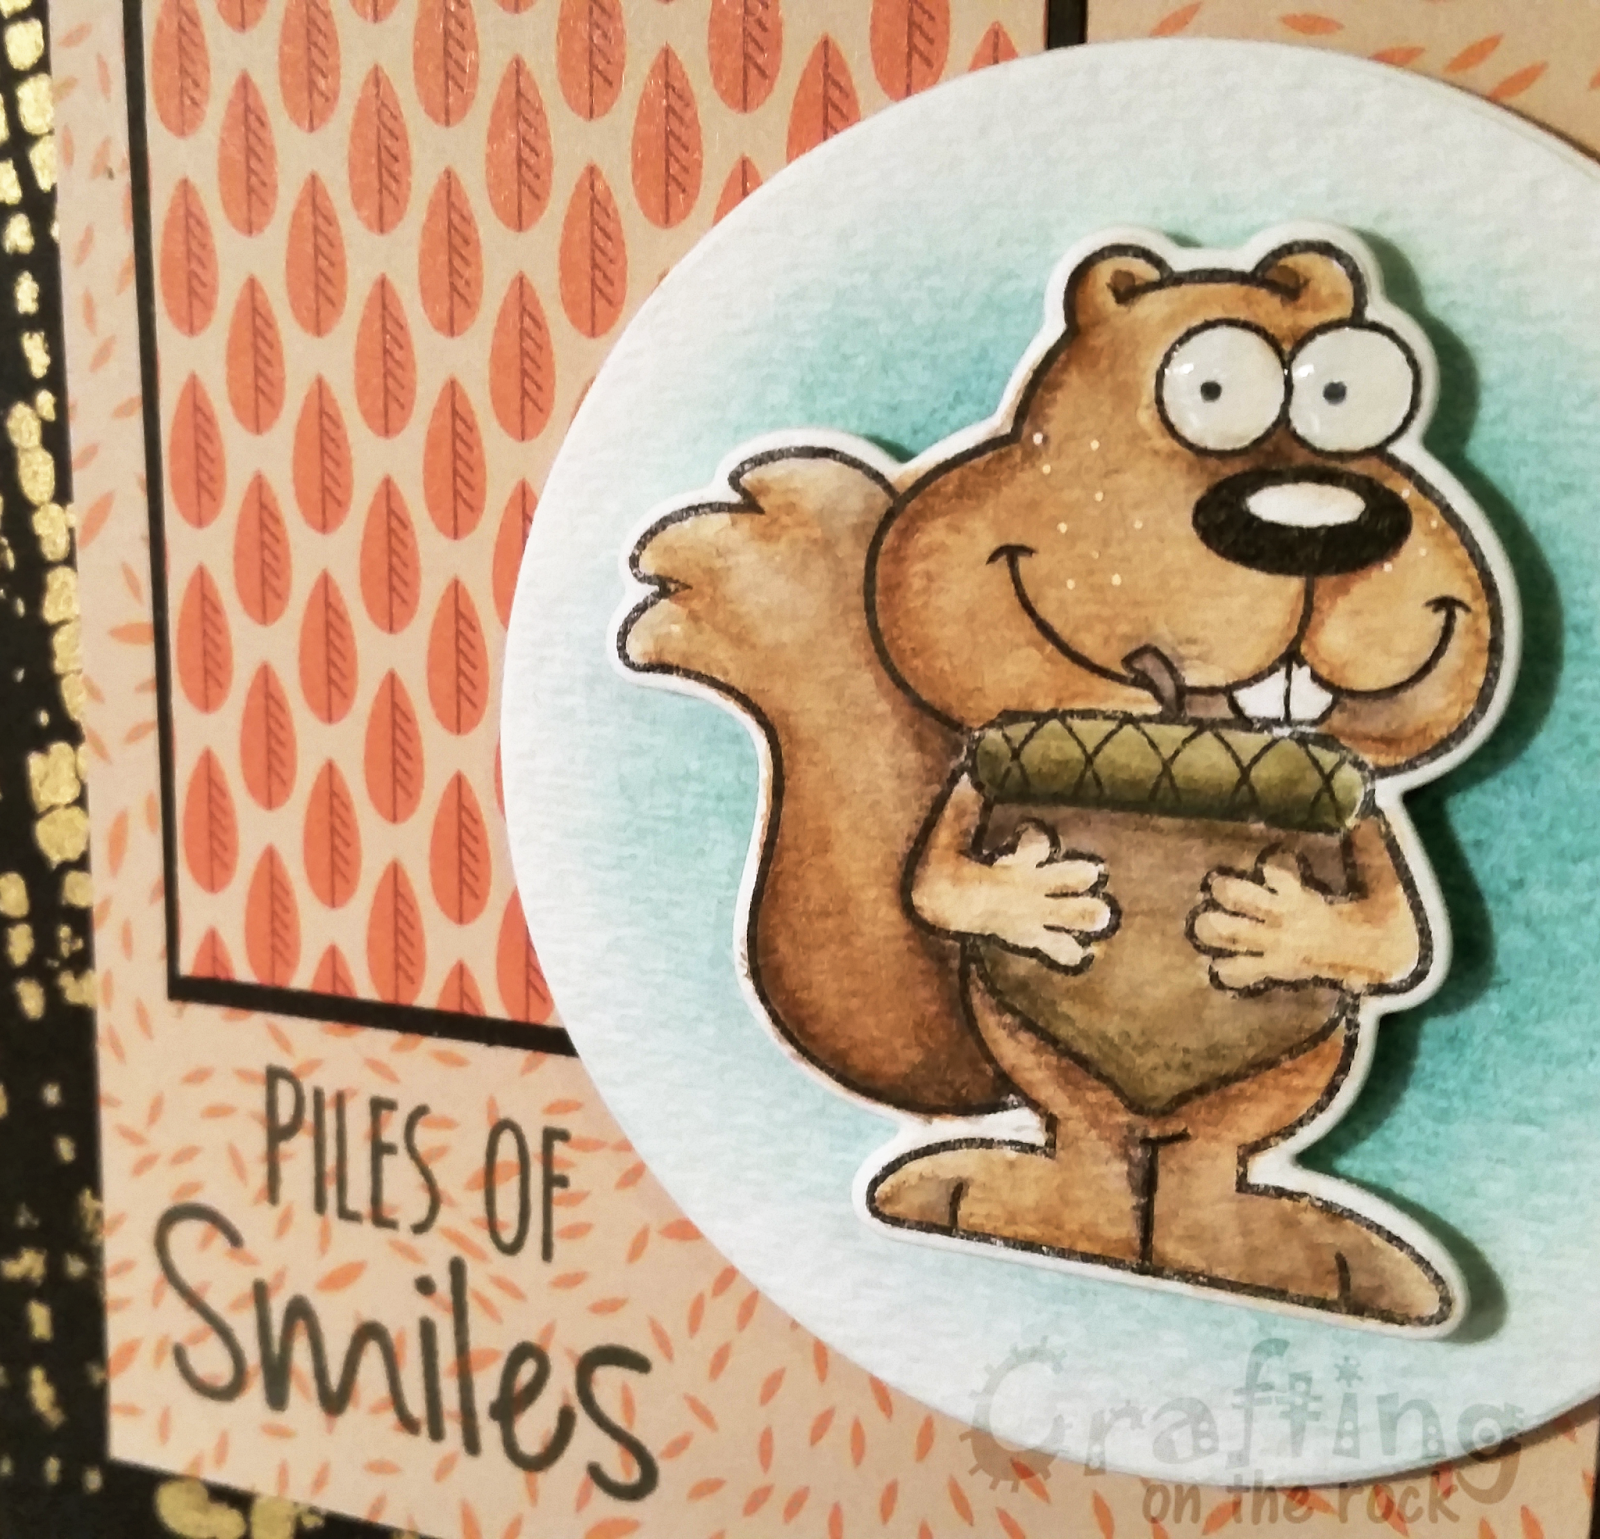
I made this card for the Your Next Stamp (YNS) Sketch and Color Challenge #25. I really loved the colors for this challenge, and I thought that I would also incorporate the sketch as well. I did change the sketch up a bit, but I think it retains the essence of it.
I used black Recollections card stock from Michael's as the base, and added Lumiere gold arylic paint through The Crafters Workshop Mini Tile Texture stencil. I used last year's Close to My Heart Pathfinder paper collection for the basic shapes, and Strathmore watercolor paper for the circle and the stamped image.
I added a bit of blue to the circle so that the orange colors on the card would really pop. The stamped image (and the sentiment) are from YNS's Piles of Smiles stamp set, and I cut the squirrel using the coordinating die. I colored the squirrel using my Derwent Inktense Pencils.
I adhered the circle and the squirrel using mounting foam squares from the dollar store, and then trimmed off the portion of the circle that stuck out over the card. I finished the card by putting a few dots of white on the Squirrels cheeks, and some glossy accents on the eyes. I'm really happy with the way this card turned out! Check out Your Next Stamp's challenge here.
I loved the colors in the latest sketch and color challenge on the You Next Stamp blog. Of course, I ended up having a few challenges while making this card; I was over halfway through the card when I dropped my black inkpad on the fron of my card and had to start over! I'm really pleased with how this came out though, so the little setback was ok!
For this card, I used Michael's cardstock, the gear stencil from The Crafters Workshop, YNS's Perfect Chemistry stamp set, Close to My Heart's (CtMH) Dizzy Circles and Birthday Funnies. I used CtMH's Indian Corn Blue ink to ink the stencil on by card base, then covered it in a second piece of cardstock in the same color as the base, with the edges inked with blue. I used a hero arts background stamp on top of purple cardstock, and then cut a circle in it to make a shaker card. To make the shaker, I used one section of a nine pocket page protector and sealed it closed with the Photo Fuse tool. I attached the shaker to the underneath of the purple cardstock using my ATG gun, and put a circle frame in white above the cardstock.
I colored the mad scientist from Perfect Chemistry with an assortment of alcohol markers, fussy cut him out, and stuck him over the shaker hole. I covered his eyes with Glossy Accents (but... after I took the photo lol). I then mounted the entire front panel to the cad base using foam tape. I finished the card off by stamping a sentiment from the Stamps of Life Tic Tac Toe set onto white card stack, put a little CtMH silver shimmer trim under it, and stamped my greeting on the inside.
If you get a chance, check out Your Next Stamp's amazing blog challenges! They help you get back on your crafty feet when inspiration lacks!


